Sunday, October 30, 2022

Back to Utah Heading South

Map of this blog's locations click this link to open the map

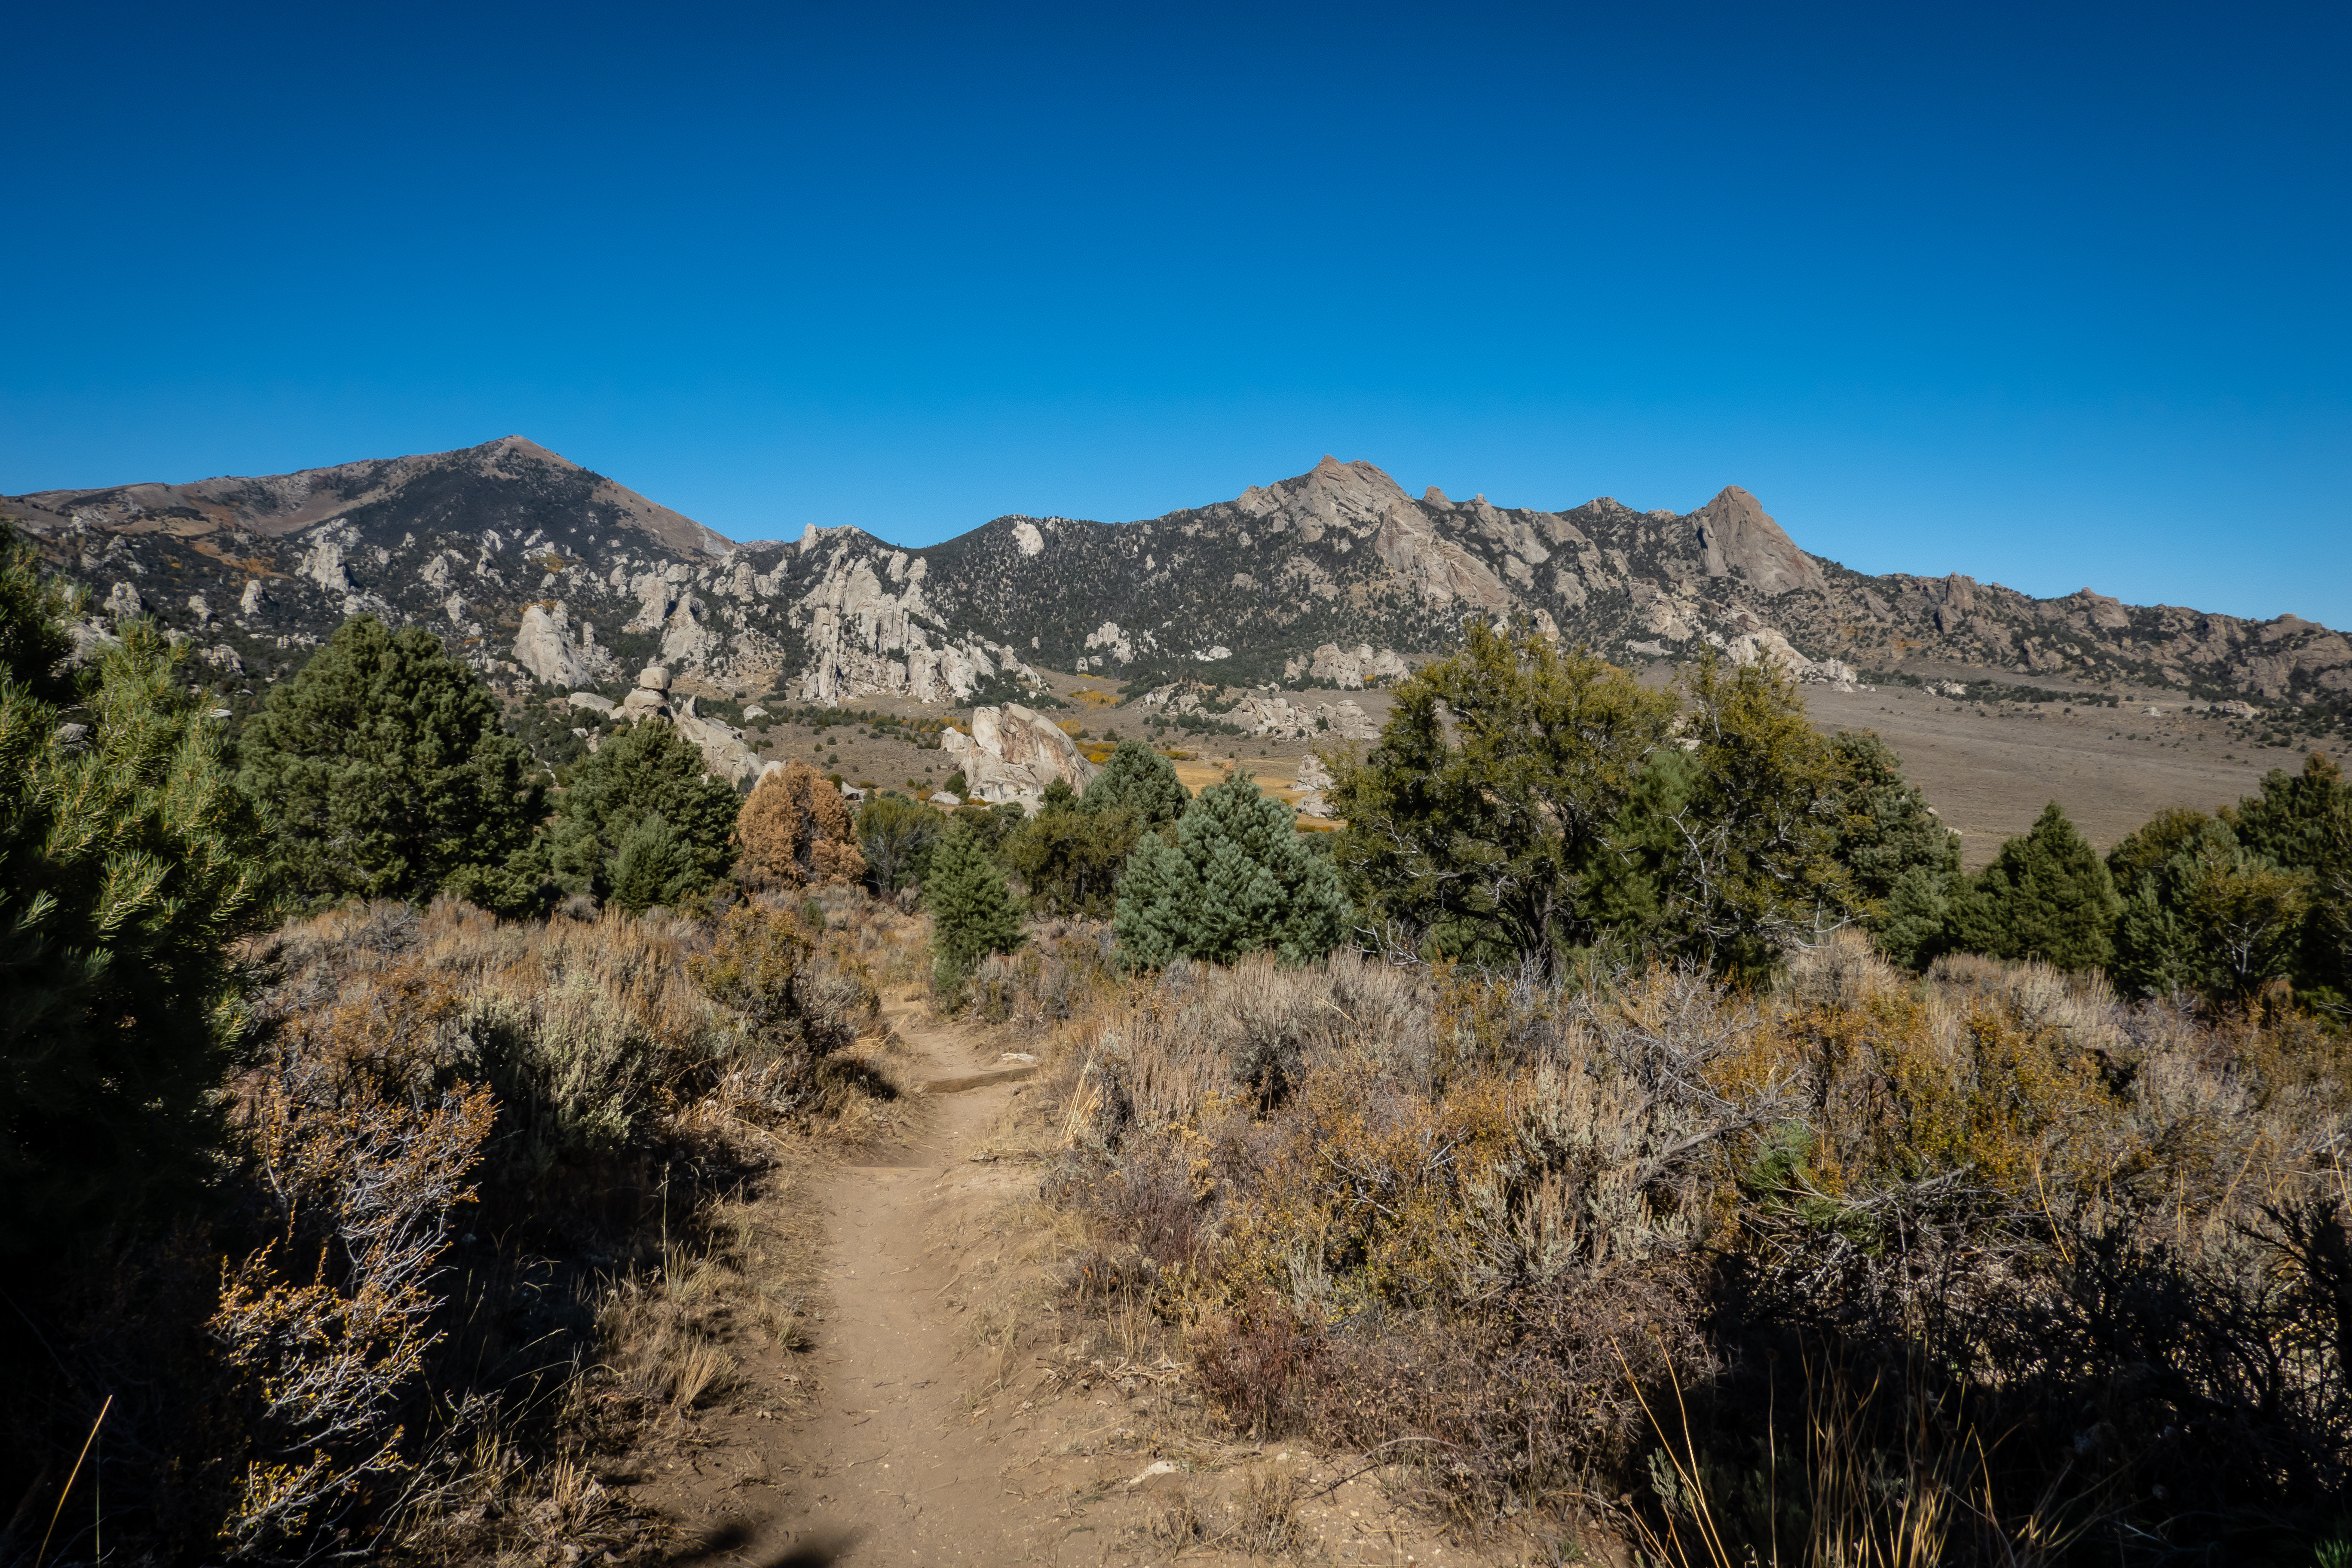
The winter storm that passed through this part of Idaho left some snow on the nearby mountains but by staying one extra night, we were able to leave on a sunny Tuesday morning. The roads were clear and even dry as we headed back to the Salt Lake City area. It was clear that SLC had received even more snow based on how low the snow line was on the mountains east of town. I suspect that some of the trails we hiked just a couple weeks ago were now snow covered and slick. We had about a 170 mile drive from Almo Idaho to the Bountiful Utah Elks Lodge. We are expecting this to be the last travel day where we are forced to drive separately.

We will be taking the new Jeep into Pards on Thursday morning to have it setup for flat towing behind the motorhome. Pards is about 9 miles south of SLC and Bountiful is about the same distance to the north. The lodge only has 2 RV sites with electric and water as well as a dump station. We are hoping there will be a spot open when we arrive so we can make our plan work. We pulled in to find one fifth wheel in one of the spots but the other was open. As we were plugging into the power pedestal, another small motorhome pulled into the lot, saw both spots were occupied and headed out. I guess we timed that pretty well. The Bountiful lodge isn’t very active, so we never saw it open so we simply put our camping check in an envelope and placed it in their mailbox. The lodge worked out fine although it is right along a rather busy street so there was almost constant traffic noise. Good thing it was cold and all our windows were closed.

SLC has a pretty reasonable public transportation system with buses and light rail service that extends well south and north of town. We investigated where the train stops are and have a strategy. Drop the car off Thursday morning, walk a mile or so to the train stop, take the train north to the Bountiful station and walk another mile back to the motorhome at the lodge. We could have included some bus rides but the walks were short enough that it wasn’t worth the time and effort to figure out the bus system too. They will make all the modifications to the Jeep on Thursday and we will bring the motorhome in on Friday morning so they can install the other half of the braking system since it needs to tie into the air brakes.

A bit of a primer on flat towing a vehicle - sometimes called towing 4 down. For this type of towing, the vehicle rides on all four of its wheels without the need for a trailer or tow dolly. First off, the car to be towed must be capable of being transported this way. Fewer and fewer cars are being identified by the manufacturers as being flat towable. Back in 2012, a publication that summarizes which vehicles will work had about 51 different models in their listing. In 2022, that number is down to just 34. A decade ago, several Subarus and Hondas were able to be towed and were rather popular choices but neither of these manufacturers have a model that works today. Plus there is an additional criteria that some models that can be towed must have a specific transmission. For instance, the Grand Cherokee we bought can be flat towed but many of the lower end models of Grand Cherokees cannot.

Once you have a car that can be flat towed, it must be setup to do so. This involves a few components be installed on the car. On our 2014 Jeep Cherokee, I had a friend help me do the work in my garage where I had practically all the tools required to do the job. I simply ordered all the parts and we went to work. It took us two days to complete but it wasn’t too bad other than the fact that you must disassemble a large portion of the front of the car! Now that we’re on the road, my toolbox has some important things but is not nearly adequate to handle such a large undertaking. Plus my friend is back in Rochester. This is why we had to seek out professional help.

There are three main component systems that must be installed. First, a base plate that will firmly attach to the front of the car and provide connection points for a tow bar that is mounted in the towing vehicle’s receiver. Second, some sort of braking system. There are many options. On our first setup, I used one from NSA Products called the Ready Brute. It worked great since our first motorhome was a gas rig and didn’t have air brakes. Now that we have a diesel pusher with air brakes, the best braking system is the Demco Air Force One. This will tie into the motorhome’s braking system and supply air to a controller that in turns applies the Jeep’s brakes. The third system required is an electrical connection that will feed signals from the motorhome to the Jeep for lights, turn signals and brake lights as well as a trickle charge so the Jeep’s battery doesn’t go dead while towing.

Here is a picture of the front of our Jeep after the install. The red tow hooks are part of the Trailhawk model and don’t have any association with flat towing so those can be ignored. Just inboard of the tow hooks, circled in white, are the mounting points of the base plate where the tow bar connects. The two items circled in green are connections for the braking system. The lower one is where an air line from the motorhome connects. The upper green one is an emergency break away switch that if for some unforeseen reason something breaks and the Jeep goes off on its own, a cable will pull the pin out of the switch and apply the brakes bringing the Jeep to a stop. Let’s hope we don’t experience that nightmare scenario! The lower red circled item is the connection for an electrical umbilical feeding the Jeep signals for turn signals etc. The second red circled item is a two wire connector to feed a 12 volt trickle charge to the Jeep.

Front of Jeep Showing Flat Towing Connections

Bright and early Thursday morning, we headed to Pards and dropped the car off. We walk a mile or so north to the Murray Central station. It wasn’t too difficult to figure out how to get tickets from the kiosk to get us from here to where we needed to go near Bountiful. The trick was knowing which set of tracks to stand next to. There are several rail lines and two sets of tracks at this station. One is more of a local rail line that has numerous stops and goes all over the city. We wanted the other line called the FrontRunner which is more of a long distance line that goes all the way from Provo in the south to Ogden in the north which covers about an 80 mile distance. We only needed to go three stops to the north. We had about a 20 minute wait before our train arrived and it looked to be what we wanted and it was definitely heading north so we boarded. The train cars were fairly nice with two levels of seats. There was room for bikes and strollers and even Wi-Fi available. It only took about 30 minutes to get to our stop at Wood Cross station. It was a little bit longer walk but we got back to the lodge and settled in.

Our FrontRunner Train Car

We were expecting a call from Pards late in the afternoon telling us the car was done and what time we should come in with the motorhome. When we didn’t hear from them, I was a little nervous and called before they close at 5 PM. It turns out that our 2022 Grand Cherokee is a new model that they had never worked on before. They assured me they had the right parts and we’re not running into any issues other than it was different enough to slow down their progress. They were going to stay late and try to get it done yet that evening. When I called Friday morning, they needed just another hour to finish up. This actually worked out fine since heading there at 10 AM meant I wouldn’t need to drive the motorhome thru SLC during morning rush hour.

It was going to take until mid afternoon to make the modifications to the motorhome so we grabbed the Jeep and headed out to do a little bit of sightseeing. We didn’t want to go too far or try a long hike in case we received a call from the shop. We used a few of the highly favorited geocaches on the southeast side of SLC as a guide and headed to Sugar House Park and Tanner Park. The later had a very large off-leash dog park. We kind of felt out of place as we did the 1/2 mile hike to one of the older caches in the area. Everybody else had at least one dog with them and the other dogs really seemed to be enjoying themselves. Next we headed out for lunch and then to the Wheeler Historic Farm since it was only a couple miles from Pards. It was a beautiful fall day and there were a fair number up people out enjoying the weather, old farm buildings and the animals. As we walked around, I got the deja vu feeling like we have been here before. I vaguely remembered finding a geocache here but couldn’t remember the details until I looked at a map of our past finds. Sure enough, we were here in June of 2017. Since it had been more than 5 years ago and it was a beautiful setting, we didn’t mind walking around to see some of the sights again.

View at Tanner Park

Mountain View at Wheeler Farm

Large Barn

Double Stuff Oreo Cow?

Intricate Chainsaw Carving

Since it was late afternoon by this point, we headed back to the shop even though we hadn’t received a call yet. We needed to wait 45 minutes before they said we should pull the car around and they would finish the towing setup by actually connecting the car to the motorhome with our new tow bar. We quickly discovered that this car sits several inches higher than the receiver on the back of the rig. We needed to get a riser block that would make up the difference. I hoped they would have what we needed but instead of having a selection of different sizes, this shop takes measurements and fabricates it on the spot. We went through all the connections and had the air braking system get a final adjustment with the vehicles attached.

Chris had investigated what needs to be done for our Grand Cherokee to be switched into flat towing mode. She had found an excellent resource with the same model who had done all sorts of research about some of the problems others have had when first setting up their new car. It turns out that this car has many safety gizmos which are great for normal driving of the car but pose a bit of a problem when flat towing. Apparently the biggest issue is with the electric emergency brake getting activated either before pulling out after connecting the vehicles or worse, having that happen along your route. Our rig has enough power that I likely wouldn’t notice if the Jeep’s wheels were locked up and being dragged until our tire pressure monitoring system detected high temperatures of the tires or we smelled burning rubber. She had made a step by step list of instructions on how to configure the various safety menu items before we pull out. We had practiced this a few weeks earlier just to make sure we knew what to do but it wasn’t until now that we could put it to the test.

The sun was just setting as we finalized everything and went in to pay. It wasn’t a cheap bill - a little over $4800 plus tax. But parts were about 75% of the total so the cost for installation was not quite $1200. Pards did a very nice job with the install and didn’t charge us more than they quoted when the install took much longer than they originally expected. I suspect when the next new model Jeep Grand Cherokee comes in, they will have adjusted the install price to account for the added complexity.

We pulled out with just a little bit of daylight left. Generally we don’t travel with the motorhome in the dark since it will mean we are needing to setup camp in the dark. It also didn’t help that it was rush hour on a Friday so traffic was horrible. Our plan was to drive the 40 miles south from Pards back to the Provo Elks Lodge. We had stayed there about 3 weeks ago for one night on our way to purchase the Jeep. This time we were hoping to stay a few nights since there seemed to be a lot to see and do in this area. We pulled into the lodge’s parking lot only to find all 5 of the sites with electric were already occupied. That meant we had to take one of the dry camping sites and run the generator. We headed into the lodge to fill out the paperwork and pay for our site and we ended up sitting and talking with several of the lodge members for 90 minutes while having a couple beers.


Provo Elks Sign at Night

It wasn’t clear whether any of the 5 traveling Elks were expecting to leave the next morning. If so we likely would have simply moved to their vacated spot and spend a few days in Provo. So we instead started to make some plans further south in Utah and continue toward St George which is about 250 miles from Provo. We picked a small private campground in the town of Nephi to spend 2 nights. It would get us to about 200 miles from St George and would allow us to find some geocaches in a couple of Utah counties nearby that we had not yet cached in.

Since it was a short drive on Saturday morning from Provo, we got in relatively early and I had the chance to go get a cache in one of the counties we needed. The view from the cache site was nice with a frosting of snow on the nearby mountains and it looked like this area might have other things to see and do if we just investigate a bit.

View from Geocache

That first evening while at High Country RV Park we started to look for things to see or do in the area and stumbled upon the Mount Nebo Scenic Byway. It is a 38 mile road that goes between Nephi and Payson Utah. From the pictures we saw, it looked like a very beautiful drive. It started just 7 miles from camp and we could turn it into a 70 mile loop by taking Interstate 15 from Payson back south to camp. There are quite a few trails listed along the drive as well as numerous geocaches. We knew there were more activities that we could fit into one day so we would need to be judicious about which stops we pick if we want to be back by dark. It looked like it was a paved road for the complete scenic drive but the info we found did say it is closed in winter. Unfortunately we couldn’t find if that meant it was closed between two specific dates or if it gets closed based on actual snow levels. We couldn’t find any real-time info about it being closed so we headed out for a day of fun.

We had a beautiful clear, sunny day for the drive so weather was looking great. We had gotten below freezing overnight but it was supposed to get into the low 50’s during the afternoon. We made a few stops early in the drive to do some short hikes to geocaches and got to take in some of the wonderful views of the snow capped mountains. One of them is Mount Nebo, the highest peak in the Wasatch Range but it was never perfectly clear which one it was.

View Along Scenic Drive

We were only about five miles into the scenic drive but we had already gained 1500 feet in elevation when we came upon our first snow at a geocache along the road. At the 9 mile point is a pullout for the Devil’s Kitchen. We had even more snow at this point and one of the nearby caches was covered in a few inches of the white stuff. It had been a long time since we had to find a cache in the snow but years of living in western New York had developed our skills enough that we remembered how to do it. Devil’s Kitchen is touted as a mini Bryce Canyon. It does have a lot of similarities to that national park, but the emphasis should be on the mini since the view was just over a very small part of a hill.

Devil's Kitchen View

Another Mountain View

As we proceeded the snow levels kept increasing. Initially the road was mostly clear and dry with just a few patch’s of snow that had drifted. We stopped at another viewpoint for a geocache but this one was near a fence line with 10 inches of snow and we had not bothered to bring gloves along. We didn’t last long until our fingers were numb. There weren’t many other people up here which turned out to be a godsend since once we got over 9000 feet in elevation the road was rather treacherous. There were usually two wheel tracks that were nearly down to pavement but the rest of the road was covered in more than a foot of snow and ice. While these tracks followed the road, they did not stay in one lane or the other for very long. It took a bit of concentration to keep the car moving safely but there were a few times when another vehicle was coming the other way and we needed to drive up and out of the ruts to leave room for the two of us to pass. I’m not so sure the road should have been open because the conditions were terrible. But the views were great up here!


A Good Amount of Snow Up Here!

We crested at about 9350 feet and started the drive down. It was bad conditions for a few miles but steadily improved as we headed down. We came upon a few more cars heading up but many of them were not going to make it much farther before they would be forced to turn back simply because of their low clearance. We did one last stop before heading out to see Grotto Falls. Even though we were down around 6500 feet and the road was fine, this trail was covered in snow and ice. A few spots in the sun were now in thick and deep mud. We ran into several other groups of people trying to make the hike. We were all at one short but steep ice covered portion of the trail. Those coming down were sliding on their butts and those of us going up were struggling to make it. Chris opted to turn back but I pushed on and made it to the falls. It was quite beautiful and I had it all to myself. I managed to make it back with only muddy boots. This area would be nice to explore during the warmer months since there are so many hiking trails.

Grotto Trailhead

Falls in the Grotto

Closeup View

With our 2 nights coming to an end, we will be heading to the lower elevations and warmer temperatures of St George Utah which will be nice after having over a week of very cold temperatures.

Sunday, October 23, 2022

Up to Idaho

Map of this blog's locations click this link to open the map

I mentioned in the last post about still waiting on all the parts needed to have the work done on our new Jeep so it can be flat towed. Rather than extending our stay at Willard Bay State Park north of Salt Lake City, we decided to head even further north into Idaho. It’s past mid October and going north might seem risky but the weather in this part of the country has been extremely nice and the forecast for where we are heading looks good for the next week - mid 70’s for highs and mid 30’s for lows.

Our destination is City of Rocks National Reserve near Almo Idaho. It’s about a 145 mile drive from our current location and sort of in the middle of nowhere. There is camping within the national reserve but it is only for tents or very small rigs. There are some private campgrounds nearby but they had poor reviews. An Elks Lodge in the town of Rupert has electric hookups but this would be an hour drive each way which makes visiting the reserve a pain. Castle Rocks State Park is just a few miles northeast of City of Rocks and does have a campground that we can fit in. Even better, the state park’s campground is separate from the main state park and conveniently located just a mile from the entrance to the national reserve. The Smoky Mountain campground has 37 sites with electric and water as well as a dump station. It seems like the perfect spot to base our visit so we had reserved a site for 7 nights. We made the drive without incident but it did require us to drive separately.

Entering Idaho on Interstate 84

We have found that the regulations in state parks can be confusing and those in Idaho were no different. Besides the fee for the campsite, vehicles are required to have an entrance pass. What wasn’t clear was whether both the Jeep and the motorhome would require the pass, or just the Jeep. Nor was it clear whether our camping fee included one of the vehicle passes or not. Since each entrance pass is $7 per day, our campsite was going to cost either $38, $45, or $52 per day. Being off season, there wasn’t a camp host to check with, just an entrance kiosk with equally confusing wording. We ended up deciding to buy one additional vehicle pass just to be safe. We did eventually run into a park employee walking the campground checking for proper tags and it sounded like our conclusion was correct but even he wasn’t very clear with what the rules are.

Based on the remoteness of this location and the fact that the population of the nearest town (Almo) is only 74 people, it might not be too surprising that we have no over the air TV reception and only occasionally get cell coverage if we use our roof mounted antenna and the wind is blowing just right. I guess we will be out of touch for the next week.

Having a full week here, we didn’t feel obligated to quickly see all there is within the national reserve. Instead, we would drive thru the City of Rocks and head north up Forest Road 562. Our destination was to find a few geocaches that had been hidden over 6 weeks ago but hadn’t been found yet. We have never been “FTF hounds” (first to find) like some other geocachers. It is possible to enable notifications on your phone to let you know when a new geocache has been published in order to rush off to find it first. That isn’t our style of caching, but when we are presented with the opportunity to search for recently hidden and not yet found caches in an interesting area, we will go for them.

The drive thru City of Rocks is a somewhat rough dirt road but doesn’t require a special vehicle to make it to the various trailheads. There were quite a large number of people in the reserve as we went by and it really looks like a fascinating place to explore. The drive north out of the park was much rougher. This will be the first time driving the new Jeep on roads it should be able to eat up without problem. Our caches were not hidden on a trail listed in AllTrails so we didn’t have coordinates for a trailhead. But our maps did have some dotted lines so we roughly knew where we needed to go. We did have difficulty finding the starting point of the trail and ended up driving to the northern end of our intended hike but found an area where we could park well off the road and start our journey. The colors of the autumn leaves were on full display.

Pretty Setting at Start of Hike

The trail to the south started out as a dirt road. It was in very rough shape at points but easy enough to hike. The views over the are was quite nice. A side trail heads up to Graham Peak, but it is would add nearly a mile to our hike and a couple hundred feet of elevation so we skip it.


Overlooking Valley to West

Our trail splits off the road and follows a barb wire fence line. It’s not much of a trail and is rocky at points but manageable. We eventually get to a point on the ridge where we can look over into the valley where City of Rocks is located. It is a rather stunning view at this time of year with the mountains in the distance, the rock outcroppings in the valley and the bright yellow Aspen trees interspersed along the hillside.

Trail Along Fence Line


Overlooking City of Rocks

Closeup of Fall Colors

There are some rather large rock cairns along the path but as we work our way down the hill, they aren’t really needed since the trail is rather obvious. We find the 4 caches without problem and are first to find on all of them. We work our way back to the road to discover the place we missed as we drove up the road. Our hike was about 2 miles at this point and we had the choice of backtracking on the trail we just hiked or follow the road. We picked the road mainly to just get different views of the area. Plus there is practically no traffic so we don’t need to worry about getting run over. One couple in a pickup truck did pass by and made sure we were okay. They are familiar with the area and don’t often see people walking the road. Other than it being all uphill, it was a decent walk along the road and definitely got other views to the west.

Large Rock Cairn

Entering Sawtooth National Forest on Road

Colorful Valley


Back at camp, we headed out for a walk before sunset. There is an equestrian area that is part of the campground. A trail leads from the parking area and continues into City of Rocks. The full trail is 7 miles long but we don’t have enough energy or daylight left to do more than a mile before turning around. It’s a pretty hike and even ran into a cow grazing just off the trail.


Moooo


The next morning, we saw we had gotten a call from Utah but given our poor signal level, we weren’t able to actually talk with them. We assumed it was our car dealership calling to tell us something about our registration paperwork they are working on. We drive a few miles to the visitor center for City of Rocks to see if they know how far we need to go in order to get cell coverage. They actually have decent Wi-Fi here and we can connect our phone to make a call using this instead of a cell tower. It turns out all of our paperwork was completed and they were getting ready to send it. We got a tracking number for the package so we know when the DMV in Florida receives it. We were pretty impressed with the dealer getting this done in under 2 weeks. Now we will see how quickly Florida is able to handle their side of the paperwork - maybe we will get this car registered well before our 45 day temporary tag runs out.

At Visitor Center

We head into City of Rocks to check things out and start tackling some of the many hiking trails they have. Our plan is to tie together a couple different trails to get a 3+ mile loop. We start out on the Geologic Interpretive Trail. We have a handful of EarthCaches on this unique section to help us understand some of the rock formations along the trail.

Entrance to City of Rocks

Start of Geological Trail


It was a beautiful day and the views were pretty incredible as well. This trail intersects the Geo Watt Trail and we continue west. The combination of the evergreen trees and the vibrant yellows of the Aspens make for a very pretty hike.


Pocket of Aspen


We get to a small side trail that leads to “Site 18”. Apparently this is one of the many campsites that you can reserve and hike into. Nobody was occupying the site but it is very secluded and has lots of interesting rock formations. I suppose spending the night out here might be fun.


Chris Finds an Opening

We come back out onto the Geo Watt Trail which intersects the Stripe Rock Trail. It was clear from the rock outcropping with a large stripe running through it where the trail got its name. This is a longer trail that can be used to go further west but we take it to the east to complete our loop back to the car. A very nice hike in the reserve today.

Stripe Rock


Aspens and Stripe Rock


The remoteness of our campground lends to it being a very dark night sky. I headed out one evening to see if I could get some night sky shots.

Milky Way

Night Sky Video

The following day we took the short drive up to Castle Rocks State Park. While it is a little smaller than the national preserve, it has similar rock features and lots of hiking trails. We arrived early in the morning and did some trails around the Castle Rock itself. There is a trail around its perimeter and a few others that branch off of it. There are even a few trails that go into some of the nooks and crannies of the 350 foot peak for those with an adventuresome bent.

Castle Rock

We saw some signs indicating there were some pictographs to see. Unlike petroglyphs that are carved or chipped into the rock, pictographs are painted - think ancient graffiti. We found a sign at the rock explaining where they are but then telling visitors that what remains of the images cannot be seen with the naked eye and needs a special camera to even see them. Kind of disappointing. The views of the nearby mountains and the valley covered with bright yellows and oranges made up for the lackluster pictographs   We continue around Castle Rock and heard voices but initially didn’t see anybody until we looked up and saw some rock climbers.

View of Mountains to West

Colorful Valley

Climber on Castle Rock

We work our way around the backside of Castle Rock and pick up the Backyard Boulders Trail. One rock outcropping that stood out was called Three Pools Boulders. At first it wasn’t clear where the name came from but it is possible to climb up onto them and then you can see the 3 small cavities worn into the rock. They were currently dry so they weren’t really pools but it was clear they do hold water at times. I found the large rock next to this to be even more interesting. Let your mind go and you’ll see the bird looking up into the air.

Three Pools Boulders

Bird?

There were lots more odd rock outcroppings along this trail. We likely got in just over 2 miles and headed back to the car for lunch.

Helmet?


Backside of Castle Rock


We drove down to the picnic area near lodge, bunkhouse and glamping yurt. From what we could tell, these buildings can be rented for your overnight stay in the park.

Bunkhouse and Lodge Buildings

After lunch, we headed out for another hike Chris had selected. The Bracksiecks Pillar Loop is listed as a moderate 2.2 mile trail with just under 500 feet of elevation gain. It sounded like a nice enough hike so we headed out. The first half mile is pretty flat and tame. We are approaching a large mountain jutting out of the ground that didn’t seem like a place there would be trails but we continued on. The trail then hits the loop portion and we head to the left to go around in a clockwise fashion which puts the steepest section of the trail on the uphill portion.

Trail is Still Obvious

Heading Up There?

It didn’t take long for the trail to get difficult. There were occasional signs marking intersecting trails and some rock cairns, but we managed to get off the trail and we each bushwhacked up the side of the mountain taking different routes hopefully running into the actual trail again. We finally made it through and out onto more open rock face terrain with some more cairns so we were at least feeling better about not being lost.

Looking Down Where We Came From

The only problem now was the “trail” was going across some very exposed rock sections where there was both a steep ascent as well as a steep side slope. It was one of those hikes where you really need to feel confident in your footing because it’s a long way down if you’re wrong!

Chris Crawls Up

Need to Head That Way

We were able to compare our location to that of the trail within the AllTrails app to get a sense we were on the right path but the actual conditions in person would dictate how closely I tried to follow the “trail” on the phone. I generally went first to survey the situation and make sure I was convinced we were on the intended trail then I would call back to Chris to follow me. As we reached what was the high point of the hike the views over the valley were impressive.

View from High Point of Trail

It was at about this point that I noticed that Chris hadn’t come around the last rock she needed to negotiate to catch up with me. She had made the mistake of looking down and was now frozen in place. I gave her time to recompose herself and after a few minutes, she made it to the overlook. I proceeded to the start of the downhill section and I found myself panic just a bit too. We needed to go down a rather steep, mostly smooth rock surface. It wasn’t clear to me I would be able to overcome my fear of falling and work my way over this obstacle, so how would Chris be able to do it? After surveying the situation, I went back to tell her she wasn’t going to like this next part but we would take it real slow and do it safely. The picture doesn’t really do the situation justice since it doesn’t show over the edge very well.

Our Route Down

With a combination of spider crawling and butt sliding, we made it down past this rock face. There were still some tough sections ahead but none of them would rival this one and it was nice as we started to get lower in elevation and having trees and brush to hang onto if we did slip and fall. We ran into a couple that had rock climbing gear and were heading out for a technical climb on the other side of the hike we did. We commented that that was one of the tougher and scarier hikes we have done. They commented that their teenage son will not go out climbing with them since he has a fear of heights so we didn’t feel so bad. As we came out into the open and could look back we were amazed there is a trail up there and impressed we did it.


Looking Back Up


Our Hike Track

We got back to camp and discovered they had shut off all the water to the park. Even though it hasn’t been getting all that close to freezing, I guess they wanted to be ready for the inevitable. Fortunately we had found out about the plan a day earlier so we had already filled up our fresh water tank.

The wind must have been blowing just right because we managed to get a phone call the next morning from the DMV in Florida. They had received all our paperwork and were starting to process all the forms so we could get the vehicle registered and have a title sent to us. We needed to email another document so Chris drove down to the visitor center to use their Wi-Fi. Ninety minutes later, she was back and everything was taken care of. I was able to remove our temporary Utah tag and put our old plate on the new car. The paperwork would be sent to the main DMV office and we should have a title mailed to us in 2 weeks. It felt good to have all of this taken care of. We may never need to buy another vehicle out of state and register it remotely but if we do, we have the experience under our belts.

Since this task only took part of the morning, we still had plenty of time to head into City of Rocks for more hiking. The goal was to hike the Boxtop and Bumble Trails. We figured this combination should be between 3 and 4 miles long. The trail starts out near one of the primitive campsites just off the main road and drops down into the valley over the first half mile.

Heading Down Boxtop Trail


Many of the rock formations in the park have names. In fact, this trail is named after one called Boxtop. Some of the formations and their names make sense while others leave us scratching our heads. I suppose it’s possible we aren’t looking at them from the proper orientation to be able to “see” how their name came to be. As we were coming upon one of the spires, I was convinced it looked just like a hand with a thumbs up. I haven’t figured out how to submit this to the park staff but I would like it to be called “Thumbs Up Rock”.


Boxtop Rock


"Thumbs Up" Rock

The trail eventually intersects with Striped Rock and Bumble Trails, we take the later which will bring us back around the top of the loop. There are some good colors in the trees along this trail as well. There are also several arches or window formations along the trail.

More Fall Colors

One Side of Window

Better View on Opposite Side


We had the additional support of several EarthCaches along this route to point out some of the various formations including Flaming Rock Window. From the name, I was expecting more but maybe you need to be there around sunrise or sunset instead of mid afternoon. The Bumble Trail can be taken back over to Boxtop to get back to the car but this would require us to repeat some of the hike. We instead continue up the side of the valley. It will lead us up to the road and we can walk back to the car. On the opposite side of the valley, we spot another climber. This is definitely a big climbing destination. I suspect many of the visitors come here specifically to climb but City of Rocks is great to hike or even just view from some of the viewpoints along the road.

Underwhelming Flaming Rock Window


Another Climber

We have been really enjoying our stay here and we still have two full days left before we are to head back to Salt Lake City on Sunday to have the car setup for flat towing the following day. The only problem is that the weather forecast is changing and a rather nasty sounding winter storm is to be coming into the area in a couple of days just in time for our 150 mile drive. We call the business to see if we can delay the install a day or two so we don’t need to drive the motorhome in a snowstorm. Turned out they were still missing one component that was due to come in on Wednesday so our coming into town a day late will be fine.

With one nice day remaining, we head back into the reserve to explore many of the places most people will check out on their first day here. We have driven past the Circle Creek Rock House numerous times but never stopped to investigate the old building. There isn’t much information about the place. Only a few of the walls of the 1904 building remain and it is fenced off so it’s not possible to get a real good look at it.

Circle Creek Rock House

Another View

A bit further along the road is Camp Rock and Kaiser’s Helmet. The former is a spot where emigrants traveling along the California trail would often stop for the night. Many would write their names on the rock with axle grease. The later is the name of a rock formation where the name actually makes a lot of sense. It looks a lot like a World War I German soldier’s helmet including the spike on top.

Names on Camp Rock

Aptly Named Kaiser's Helmet

Continuing down the main park road is a stop for Register Rock. This is another large rock outcropping where emigrants wrote their names. We got out of the car and walked around the large rock. Given most of these names were written nearly 150 years ago, I am somewhat amazed that the names are still legible.

Register Rock

We continue south on the road to check out Twin Sisters. There are a couple of interpretive signs along the way with some nice views of the varied rock outcroppings. Twin Sisters is interesting in that even though the two rocks are side by side, one is 2.5 billion years old while the other is a mere 25 million years old.


Twin Sisters

The next stop on our tour of City of Rocks is Window Arch. This is one of the more popular stops in the park. You can park within a few hundred feet of the arch and the biggest problem is waiting your turn to get some photos.

Window Arch


Other Side of Window Arch

Bath Rock is the next stop. For some reason, this place is a very popular climbing location. We saw at least 3 groups working on different faces of the rock. We stopped to watch one guy. From our vantage point, he appeared to be stuck. The small crevice he was going up didn’t seem to have any spots to place his toes or fingers and expected he would drop down on his rope and try another approach. But just as we thought that, he nearly scampered up the rock to the top. As we came around the corner from him, there appeared to be a way up that even I might be able to climb and reach the same point he achieved but I decided coming back down might be a real challenge so I passed.

Climber on Bath Rock


Bath Rock

We found a spot across the road from Bath Rock to eat our lunch before heading out on the Creekside Towers Trail. We started out on the 1.4 mile loop with a couple of climbers. They were heading to some rock along this trail. Even after a brief talk with them, it wasn’t clear what drives them to climb. This was a pretty trail with both overlooks above the valley and some wooded trails. Again the fall colors were at peak. In the next day or two as the storm passes through, the winds may bring down many of the leaves and it’s not clear how much snow we might see. Our timing was nearly perfect.

View from Creekside Towers Trail


Wooded Section of Trail


We crossed paths with the climbers just as they were starting their climb. We decided to avoid making them nervous by watching them. We extended the loop a bit at Parking Lot Rock by continuing around the north side of it. This one seems to be named based on its proximity to a parking lot as opposed to looking like one! There turned out to be some decent uphill sections and since we are over 6000 feet in elevation, it was somewhat of a workout but still was a beautiful hike.


We had gotten done with this whirlwind tour fairly early in the afternoon. We didn’t hike every single trail in the park but we did a large number of them. I went for a drive by myself in search of geocaches in three other Idaho counties we haven’t been to yet but were not too far from camp. As I was driving thru the town of Rupert, I was noticing many dozens of large trucks carrying some sort of harvest. At first I assumed they were potatoes since we are in Idaho. But I was able to get a better view of the cargo in the dump beds and realized that while they looked like some sort of crop that grows in the ground like a potato, they were not shaped like potatoes. I came to the conclusion I was looking at sugar beets being harvested and heading to processing plants in the area. We have heard of work camping jobs around this time of year working the sugar beet harvest. Most of the jobs I had heard about were in the Dakotas and Minnesota area but it looks like this part of Idaho is a big sugar beet growing area. As I drove by one of the apparent processing plants, there were huge piles of sugar beets all over the place. I suspect the huge amount of activity was to try to harvest as much of the fields as they could before the bad weather comes in and makes the fields too wet to work.

Unusual Artwork

We were originally scheduled to leave on Sunday and drive into Salt Lake City, but the storm started coming thru on Saturday and was expected to get worse on Sunday. SLC had all sort of weather warnings posted for travel on Sunday but by Monday it was supposed to be sunny again. We decided to simply extend our stay in the state park one more night. Earlier in the week the campground had been nearly full. Now, everybody but us and one other hearty soul pulled out early to beat the weather. So keeping our spot wasn’t an issue. It definitely got cold and some snow flakes were flying in camp, but it wasn’t too bad. The nearby mountains had a nice dusting of snow on them after the front went through.


Snow Covered Mountains

City of Rocks National Reserve turned out to be quite a wonderful stop. We were so glad one of the salesmen at the dealership in Brigham City had mentioned this place because we likely wouldn’t have found it on our own. Even our timing wasn’t horrible. Since we needed to wait for parts for the car, we were more or less stuck too far north in late October so whether we waited out the storm in Idaho or Salt Lake City, we were going to need to suffer through it. Plus it looks like the weather was going to improve so we should be able to get the car setup and out of here before we get stuck for the winter!